Dealing with noisy bathrooms can be a major nuisance, disrupting peace and privacy. If you’re wondering, “what is the best way to soundproof a bathroom wall?”, the answer depends on various factors, including the type of noise, your budget, and your DIY skills. A combination of methods often yields the most effective results.
This comprehensive guide explores various techniques, from simple fixes to more advanced solutions, to help you create a tranquil bathroom oasis.
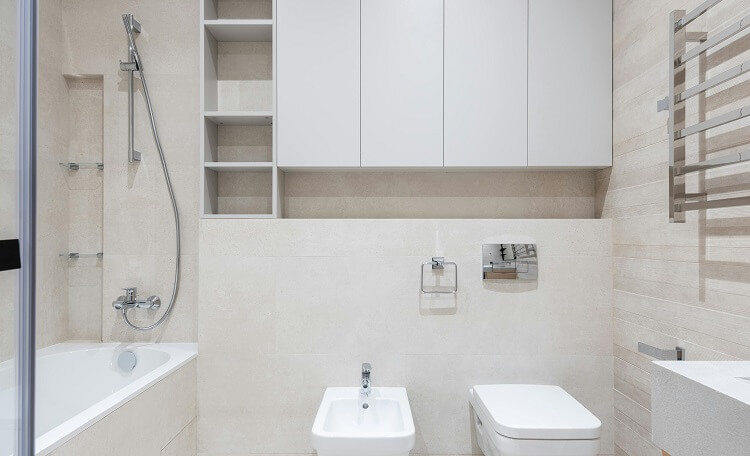
Why Bathroom Walls Let Noise Through
Bathroom walls often transmit noise easily due to their construction. Lightweight materials like standard drywall offer minimal sound resistance. Furthermore, the abundance of hard, reflective surfaces such as tiles, porcelain fixtures, and bathtubs amplifies sound vibrations.
Plumbing pipes, both within the walls and exposed, can also act as conduits for noise. Finally, gaps and cracks around fixtures, electrical outlets, and along wall edges allow sound to leak through. Addressing these factors is crucial for effectively soundproofing a bathroom wall.
Tools and Materials for Wall Soundproofing
Before starting your soundproofing project, gather the necessary tools and materials.
The specific items will depend on your chosen method(s), but common supplies include:
- Mass-loaded vinyl (MLV)
- Acoustic panels or foam
- Green Glue noise-proofing compound
- Insulation (e.g., fiberglass or mineral wool)
- Resilient channels
- Acoustic caulk
- Measuring tape and utility knife
- Drywall (optional for additional layers)
- Safety glasses and gloves
- Screws and construction adhesive
Assessing the Wall’s Soundproofing Needs
A thorough assessment will help determine the most effective soundproofing strategy. Pinpoint the wall’s vulnerabilities by:
- Inspecting for Gaps and Cracks: Use a flashlight to identify any openings around pipes, fixtures, electrical outlets, and along wall edges and corners.
- Testing for Hollow Cavities: Gently knock on the wall. A hollow sound indicates empty space within the wall cavity where additional insulation can be beneficial.
- Evaluating Plumbing Areas: Identify noisy pipes and consider wrapping them with sound-dampening materials.
- Identifying Noise Sources: Determine the primary sources of noise (e.g., shower, toilet, exhaust fan) to target soundproofing efforts effectively.
Best Techniques for Soundproofing Bathroom Walls
Installing Mass-Loaded Vinyl (MLV)
MLV is a dense, flexible material highly effective at blocking airborne noise.
It can reduce noise transmission by 20-30 dB. Install MLV by measuring the wall, cutting the MLV to size, and attaching it directly to the existing drywall using screws or adhesive. Overlap seams by at least 4 inches and seal them with acoustic caulk.
For maximum effectiveness, add a layer of drywall over the MLV.
Adding Acoustic Panels or Foam
Acoustic panels and foam absorb sound reflections, reducing echo and reverberation, especially in mid-to-high frequency ranges. While not as effective as MLV for blocking sound transmission, they can improve the overall acoustic environment of the bathroom. Attach panels to the wall using adhesive strips, focusing on areas near noise sources.
Using Insulation for Wall Cavities
Filling wall cavities with fiberglass or mineral wool insulation helps absorb sound and dampen vibrations.
If the wall is open, simply fill the cavities with insulation. For existing walls, remove a section of drywall to access and fill the cavity. Then, reseal the wall with new drywall and finish as desired.
This method is effective for both airborne and impact noise.
Applying Green Glue Noise-Proofing Compound
Green Glue is a viscoelastic damping compound that converts sound energy into heat, significantly reducing sound transmission. Apply Green Glue between two layers of drywall. The second layer adds mass and further dampens vibrations, maximizing the compound’s effectiveness.
Installing Resilient Channels
Resilient channels decouple the drywall from the wall studs, minimizing vibration transfer.
This is a more advanced and costly method, but very effective for reducing low-frequency noise transmission. Attach the channels to the studs, then mount new drywall onto the channels. This is best done during wall construction or major renovations.
Sealing Gaps and Cracks with Acoustic Caulk
Acoustic caulk is an inexpensive yet effective way to seal small openings that leak sound.
Apply caulk around the edges of the wall, along joints and corners, and around plumbing fixtures and electrical outlets.
Adding a Second Layer of Drywall
Adding a second layer of drywall increases wall mass and improves sound insulation. For optimal results, use thicker drywall (e.g., 5/8 inch) and apply Green Glue between the layers.
Soundproofing Plumbing Areas
Wrap noisy pipes with soundproofing tape or specialized pipe insulation sleeves. Seal any gaps around pipes with acoustic caulk to further minimize noise transmission.
Soundproofing Tiles and Hard Surfaces
Using sound-absorbing mats or underlayment beneath tiles can help reduce noise reflection.
Employing a rubberized adhesive for tile installation can also minimize vibration transfer.
Comparing Soundproofing Techniques
| Method | Cost | Difficulty | Effectiveness |
|---|---|---|---|
| Mass-Loaded Vinyl (MLV) | $2-4 per sq ft | Medium | Very High |
| Acoustic Panels | $1-3 per sq ft | Easy | Moderate |
| Insulation | $0.50-1 per sq ft | Medium | High |
| Green Glue Compound | $0.50-1 per sq ft | Medium | High |
| Resilient Channels | $1-2 per sq ft | Hard | Very High |
| Sealing Gaps with Caulk | $5-10 per tube | Easy | Moderate |
| Second Drywall Layer | $1-2 per sq ft | Medium | Very High |
| Plumbing Soundproofing | $5-20 per pipe | Medium | Moderate |
| Tile Soundproofing | $2-5 per sq ft | Hard | High |
Note: Costs are approximate and can vary depending on location, materials used, and labor.
Expert Tips for Effective Bathroom Wall Soundproofing
- Combine Methods: For the best results, combine multiple techniques. For example, using MLV with Green Glue and a second drywall layer creates a highly effective sound barrier.
- Address Adjacent Surfaces: Sound can travel through floors and ceilings. Consider soundproofing these areas as well for comprehensive noise reduction. For more information on soundproofing a bathroom floor, visit here.
- Regular Inspection: Periodically inspect soundproofing materials and replace any worn or damaged components to maintain effectiveness.
FAQ
Can I soundproof a bathroom wall without removing drywall?
Yes, methods like applying MLV directly to the existing wall, adding acoustic panels, or using Green Glue beneath a second layer of drywall can be effective without tearing down the existing wall.
What is the most effective material for wall soundproofing?
MLV and dense mineral wool insulation are considered among the most effective materials for blocking sound transmission due to their high density and sound-dampening properties.
For optimal performance, combining these with other techniques, such as Green Glue, delivers superior results.
How much does it cost to soundproof a bathroom wall?
Costs depend on the chosen methods and the size of the wall. Sealing gaps with acoustic caulk can cost as little as $5-10, while a full-scale soundproofing project involving MLV, Green Glue, and a second drywall layer can range from $3-7 per square foot. Professional installation will add to the overall cost.
Conclusion
Soundproofing a bathroom wall enhances privacy and creates a more relaxing environment.
Determining the best approach to soundproof a bathroom wall depends on individual needs and budget. By understanding the various techniques available, from simple caulking to advanced methods like resilient channels, you can choose the most effective solution for your specific situation. Even small improvements can make a noticeable difference.
Implement these techniques, and enjoy the tranquility of a quieter bathroom.