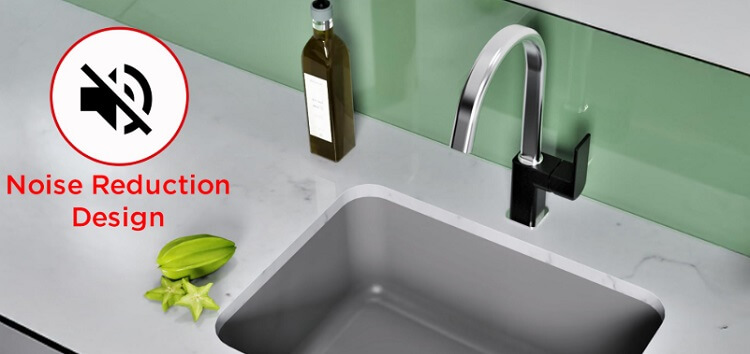
If you’re wondering, “What is the best way to soundproof a kitchen sink?”, the answer depends on the specific noise you’re experiencing. For the clatter of dishes, a thicker sink basin or sound-dampening mats might be sufficient. If it’s the roar of the garbage disposal, vibration-damping materials and a rubber gasket are key.
And for the sound of rushing water, consider spray foam insulation and a quieter faucet. Addressing these noises individually leads to a more peaceful kitchen environment.
A noisy kitchen sink can disrupt the tranquility of your home. From the clang of dishes to the whir of the garbage disposal and the splash of water, these sounds can be a constant source of annoyance.
Fortunately, soundproofing your kitchen sink is a relatively straightforward process that can dramatically improve your kitchen experience.
By implementing the right techniques and materials, you can create a quieter, more serene kitchen. This comprehensive guide will walk you through practical, cost-effective methods to minimize sink noise and answer the question: what is the best way to soundproof a kitchen sink for your specific situation?
Why Is Your Kitchen Sink So Noisy?
Pinpointing the source of your kitchen sink noise is crucial for selecting the most effective soundproofing solution. Several culprits contribute to the cacophony:
Common Noise Sources
- Water Impact: The sound of water striking the sink basin, especially in thinner stainless steel sinks, can be surprisingly loud.
The force of the water creates vibrations that resonate through the sink and into surrounding cabinets.
- Vibrations: Garbage disposals and even some faucet fixtures generate vibrations that transfer to the sink, amplifying noise. Older, worn-out disposals are particularly noisy.
- Dish Clatter: The impact of dishes, pots, and pans against a hard sink surface contributes to the overall noise level. This is especially noticeable with lightweight sinks.
- Pipe Noise: Water rushing through pipes, especially older or poorly secured pipes, can create a whooshing or hammering sound that adds to the overall kitchen noise.
The sink material itself plays a significant role.
Lightweight stainless steel sinks are notorious for amplifying noise, while heavier materials like composite granite or cast iron absorb sound more effectively. Identifying the specific source of your sink noise will guide you towards the most effective soundproofing methods.
Benefits of Soundproofing Your Kitchen Sink
Soundproofing your kitchen sink offers more than just noise reduction; it contributes to a more comfortable and enjoyable kitchen experience.
Enhanced Comfort
A quieter kitchen translates to a more relaxing atmosphere, especially in open-plan homes where kitchen noise can easily travel to other living spaces. Imagine preparing meals and cleaning up without the constant din of a noisy sink.
This improved soundscape makes everyday kitchen tasks less stressful and contributes to a more peaceful home environment.
Improved Home Value
Quiet appliances and fixtures are becoming increasingly desirable features for homeowners. While a soundproofed sink alone may not dramatically increase your home’s value, it demonstrates attention to detail and adds to the overall perceived quality of the home, which can be a selling point. Potential buyers appreciate upgrades that enhance comfort and livability.
Tools and Materials Needed
Gather these essential tools and materials before you begin:
Tools:
- Utility knife
- Measuring tape
- Screwdriver or wrench
Materials:
- Sound-dampening pads or mats (e.g., FatMat, Dynamat) – Look for closed-cell foam or rubber for best results.
- Mass-loaded vinyl (MLV) (e.g., SoundAssured, TMS Mass Loaded Vinyl) – Choose a thickness of at least 1/4 inch for optimal sound blocking.
- Spray foam insulation (e.g., Great Stuff, Loctite Tite Foam) – Opt for a low-expanding, closed-cell foam designed for soundproofing.
- Acoustic sealant (e.g., Green Glue Noiseproofing Sealant, OSI Pro-Series SC-175 Acoustic Sealant)
- Rubber washers or gaskets (e.g., Danco Rubber Washers)
These items are available at most hardware stores or online retailers.
Investing in high-quality materials ensures better performance and a more durable solution.
How to Soundproof a Kitchen Sink
Step 1: Choose a Quieter Sink Material (If Applicable)
If you’re replacing your sink, consider materials like composite granite, cast iron, or fireclay. These denser materials naturally absorb sound better than stainless steel. While stainless steel can be soundproofed, starting with a quieter material provides a significant advantage.
Step 2: Install Sound-Dampening Pads
These adhesive-backed pads absorb vibrations and reduce the resonance of the sink.
Follow these steps:
- Clean the underside of your sink thoroughly with a degreaser to ensure proper adhesion.
- Cut the sound-dampening pads to fit the contours of your sink basin and sides.
- Peel off the backing and firmly press the pads onto the sink surface, ensuring complete contact and avoiding air gaps. Overlap the pads slightly for maximum coverage.
Products like FatMat or Dynamat are good choices. Aim for complete coverage of the underside and as much of the sides as possible.
Step 3: Apply Spray Foam Insulation
Spray foam fills cavities and dampens vibrations.
Choose a low-expanding, closed-cell foam for soundproofing. Here’s how to apply it:
- Turn off the water supply and disconnect the plumbing under the sink.
- Protect surrounding areas with drop cloths. Wear gloves and eye protection.
- Apply the spray foam evenly to the underside of the sink basin, filling any gaps and crevices.
Avoid overfilling, as the foam will expand.
- Allow the foam to fully cure according to the manufacturer’s instructions before reconnecting plumbing.
Step 4: Use Acoustic Sealant on Gaps
Acoustic sealant closes gaps around the sink flange, faucet connections, and drainpipe, preventing noise leakage.
- Apply a bead of acoustic sealant around the perimeter of the sink flange where it contacts the countertop.
- Smooth the sealant with a caulk tool or your finger for a neat finish.
- Apply sealant around any gaps where pipes or fixtures penetrate the sink cabinet.
Green Glue Noiseproofing Sealant or OSI Pro-Series SC-175 are good options.
Step 5: Add Rubber Washers to Fixtures
Rubber washers or gaskets dampen vibrations transmitted from fixtures to the sink.
- Disconnect the garbage disposal and faucet connections.
- Place rubber washers between the sink and the mounting hardware of each fixture.
- Reattach the fixtures securely.
Step 6: Cover the Sink Base with Mass-Loaded Vinyl (MLV)
MLV provides an additional layer of sound blocking. This step is particularly effective for reducing noise from plumbing pipes within the sink cabinet.
- Measure the inside dimensions of the sink cabinet.
- Cut the MLV to size using a utility knife.
- Adhere the MLV to the inside walls and bottom of the sink cabinet using adhesive or mechanical fasteners. Overlap seams by a few inches and seal with acoustic sealant.
Step 7: Test the Results
Run water, use the garbage disposal, and do some dishes to assess the effectiveness of your soundproofing efforts.
Listen for any remaining noise and make adjustments as needed.
Common Mistakes to Avoid
Using Inadequate Materials
Avoid using open-cell foams or materials not designed for moist environments, as they can absorb water and become less effective or even promote mold growth. Ensure the materials you choose are designed for soundproofing and can withstand kitchen conditions.
Overlooking Small Gaps
Even tiny gaps can compromise your soundproofing efforts. Be meticulous about sealing all openings around the sink flange, pipes, and fixtures with acoustic sealant.
Don’t forget about the cutout for the faucet handles.
Skipping Surface Preparation
Clean the sink surface thoroughly before applying any soundproofing materials. Grease, dirt, and debris can prevent proper adhesion and reduce the effectiveness of the soundproofing.
Applying Too Much Spray Foam
Overfilling with expanding foam can put pressure on the sink basin and cause damage. Apply in controlled beads and allow for expansion.
FAQ
How do I soundproof my kitchen sink cheaply?
Adhesive-backed sound-dampening pads are a budget-friendly option, offering good noise reduction for a relatively low cost.
Combining this with strategically placed spray foam can further improve results without breaking the bank.
Can I soundproof a stainless-steel sink?
Yes, stainless steel sinks can be effectively soundproofed using a combination of dampening pads, spray foam insulation, and mass-loaded vinyl. Addressing vibrations is key with stainless steel.
Will soundproofing interfere with plumbing maintenance?
Most soundproofing solutions, like pads, washers, and even spray foam, can be removed or worked around during plumbing maintenance. MLV inside the cabinet may need to be partially cut or removed for access to pipes, but it can be patched later.
How much does it cost to soundproof a kitchen sink?
DIY solutions using sound-dampening mats and spray foam can cost between $30 and $75.
Adding MLV can increase the cost to $100-$200. Professional installation can range from $200 to $500 depending on the complexity of the job and materials used.
What if my noisy pipes are the problem?
If pipe noise is a significant contributor, consider wrapping noisy pipes with pipe insulation or using pipe clamps to secure them and reduce vibrations. Contact a plumber if you suspect leaks or other plumbing issues.
Can I soundproof a kitchen sink in an apartment?
Most of the techniques described here can be applied in apartments.
However, check your lease agreement before making any modifications. Focus on non-invasive solutions like sound-dampening mats and rubber gaskets.
Conclusion
Soundproofing your kitchen sink is a valuable investment in creating a more peaceful and enjoyable kitchen. By understanding the sources of your sink noise and applying the appropriate soundproofing techniques, you can transform your kitchen into a quieter, more relaxing space.
Whether you opt for simple, budget-friendly solutions like sound-dampening mats or more comprehensive approaches involving spray foam and MLV, the results are well worth the effort. Remember to choose the right materials for your specific needs and follow instructions carefully for the best outcome.

